So, you want to charge your car battery using home electricity but aren’t sure where to start? First, you need to understand the types of battery chargers, as choosing the right one is vital for both safety and effectiveness. From smart chargers to trickle chargers, each has its own features and benefits. Once you’ve selected the appropriate charger, the next step is locating your car battery and setting up the charger correctly. But what’s the correct setup, and how do you guarantee you’re not making any mistakes? Let’s explore these essential steps to get you charging like a pro.
Contents
Types of Battery Chargers
When it comes to charging a car battery at home, understanding the different types of battery chargers is essential for guaranteeing both efficiency and safety. There are several options available, each suited to different scenarios and battery types.
Smart chargers are a versatile choice, automatically adjusting the charging rate based on your battery’s condition. This prevents overcharging and typically achieves a full charge in 4-8 hours. They’re ideal for most lead-acid batteries found in non-hybrid vehicles, as they continuously monitor voltage and adapt accordingly.
On the other hand, trickle chargers provide a low amperage charge over an extended period. These are perfect for vehicles that are infrequently used, as they prevent battery depletion without the risk of overcharging. Trickle chargers are especially useful for maintaining lead-acid batteries in classic cars or seasonal vehicles.
Battery maintainers keep your battery at a constant voltage without fully charging it. This function is critical for long-term storage, guaranteeing that the battery remains in good condition without undergoing the stress of repeated full charges and discharges. Battery maintainers are typically used with lead-acid batteries but can also be compatible with other types.
Standard battery chargers are designed for quickly recharging depleted batteries, offering higher amperage ranging from 1 to 10 amps. These chargers are ideal when you need to get a vehicle back on the road quickly. However, they lack the sophisticated controls of smart chargers and require careful monitoring to avoid overcharging.
When selecting a charger, always consider your battery type—most commonly lead-acid—and the appropriate charging rate and voltage to guarantee safety and efficiency. Understanding these distinctions will help you maintain your vehicle’s battery effectively and safely.
Locating the Car Battery
Before you can charge your car battery, it’s important to locate it accurately. Most car batteries are found under the hood, but depending on your vehicle, they might be in the trunk or under the rear seats. To verify you’re looking in the right place, consult your owner’s manual for precise information.
First, make certain your vehicle is parked on a flat surface and the ignition is turned off. This is critical for safety. Once you’re ready, open the hood or access the area where the battery is located. You might need to remove covers or panels, so have the necessary tools on hand.
| Car Location | Possible Battery Position | Tools Needed |
|---|---|---|
| Under the Hood | Near the engine bay | Wrench, screwdriver |
| In the Trunk | Beneath the floor panel | Wrench, panel remover |
| Under Rear Seats | Under seat panel | Wrench, seat release lever |
Look for the battery, which is typically a rectangular box with two terminals. The positive terminal is marked with a “+” sign, and the negative terminal with a “-” sign. These markings should be clearly visible and are crucial for the charging process.
If the battery isn’t immediately visible, check alternative locations such as the side of the engine bay or under a protective cover. Some vehicles have the battery hidden for aesthetic or space-saving reasons, so be thorough in your search.
Setting Up the Charger

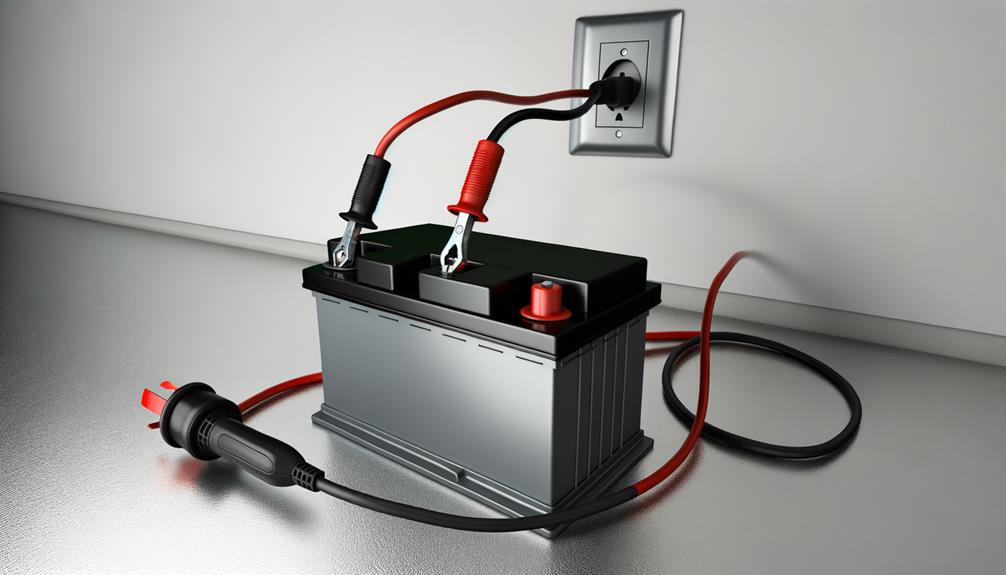
First, locate the car battery under the hood and identify the positive (+) and negative (-) terminals. Confirm the battery charger is off and set to the correct voltage before attaching the red clip to the positive terminal and the black clip to the negative terminal. Always double-check connections to avoid any risk of short circuits or electrical hazards.
Locate Battery Terminals
To locate the battery terminals, start by consulting your car’s owner’s manual to determine the exact location of the battery, as it could be under the hood, in the trunk, or even beneath seats. Once you’ve found the battery, identify the battery terminals. The positive terminal is usually marked with a “+” symbol, and the negative terminal with a “-” symbol. Knowing the correct terminals is essential to charge a car battery safely.
Before setting up the charger, verify the vehicle is turned off and in park or neutral. This precaution prevents any electrical mishaps while working with a dead car battery. Next, gather your battery chargers and confirm they are set to the correct voltage, typically 12 volts for standard car batteries.
When you’re ready to connect the charger, remember to attach the red (positive) clamp to the positive terminal first. Following this, connect the black (negative) clamp to the negative terminal. This order helps prevent sparks, promoting a safer charging process. Once everything is connected correctly, plug the charger into an electrical outlet. Monitor the charging process until the battery is fully charged.
Connect Charger Properly
Verifying the charger is turned off is your first step to avoid any electrical shock or potential damage. Once you’ve confirmed the charger is off, connect the red positive lead to the positive terminal of the battery, clearly marked with a (+) symbol. This vital step guarantees a stable connection and prevents any short circuits.
Next, attach the negative lead (black) to the negative terminal, identified by a (-) symbol. Make sure this connection is secure to maintain a continuous and safe flow of electricity. Follow the manufacturer’s instructions regarding voltage settings; for standard car batteries, it’s typically 12 volts.
After making these connections, plug in the charger to the electrical outlet. Monitor the battery charge indicator light, if your charger has one, to track the charging progress. The indicator provides real-time updates, confirming you know when the battery is nearing full charge.
When you’re ready to finish, turn off the charger before disconnecting the leads. This will prevent any accidental sparks or electrical shocks. Following these detailed steps will help you charge your battery safely and efficiently.
Charging Process Steps
When you’re ready to start charging your car battery at home, verify that the battery charger is turned off before you even think about connecting the charger clamps to the battery terminals. Begin by identifying the positive terminal, usually marked with a “+” sign and often red in color. Attach the positive (red) lead from the car battery charger to this terminal. Then, connect the negative (black) lead to the negative terminal, marked with a “-” sign.
Once you’ve securely connected the leads, plug in the charger to your home electricity supply. Set the charger to a voltage of 12 volts, which is standard for most lead-acid car batteries. Confirm you select the correct battery type, such as flooded or wet, based on your battery’s specifications. Now, you’re ready to start charging the battery.
As the charging process begins, it’s essential to monitor the charging process closely. This usually takes between 4 to 8 hours for a starting charge and could extend up to 10 to 24 hours for a full charge, depending on the battery’s condition. Many chargers come with a battery charge indicator light, which will help you determine when the battery is fully charged.
After your battery has reached a full charge, turn off the car battery charger before disconnecting the leads. Start by removing the negative lead first, followed by the positive lead. Always double-check the battery charge indicator light to confirm the battery is adequately charged before attempting to start your vehicle. By following these steps, you’ll guarantee a safe and efficient charging process for your car battery.
Using Jumper Cables

While charging a car battery at home can be straightforward, sometimes you may need a quicker solution, like using jumper cables to get your vehicle running. Here’s how to effectively and safely use jumper cables.
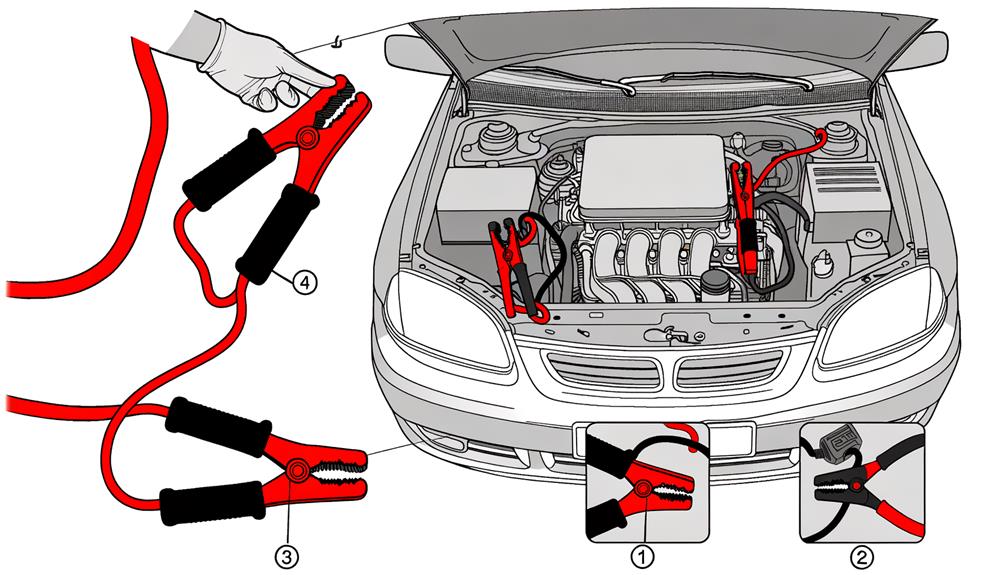
First, park both vehicles close enough to connect the cables but make sure both ignitions are off and they’re in park or neutral. The next step is to locate the battery terminals: positive (often marked with a “+”) and negative (“-“). Begin by attaching the red clip of the jumper cables to the positive terminal of the working car’s battery. Then, connect the other red clip to the positive terminal of the dead battery.
Now, attach one black clip to the negative terminal of the working vehicle’s battery. The final connection is essential for safety; attach the remaining black clip to an unpainted metal surface on the dead vehicle—this grounds the electrical system and prevents sparks.
Start the engine of the working vehicle and let it run for a few minutes to allow its charger to transfer some charge to the dead battery. This process guarantees the dead battery gains enough power to start the vehicle. After a few minutes, attempt to start the vehicle with the dead battery. If it starts, the electrical system is now functional.
Carefully disconnect the cables in the reverse order: first, the black clip from the grounded surface, then the black clip from the working battery, followed by the red clip from the dead battery, and finally the red clip from the working battery. This method guarantees safe disconnection without causing any electrical issues.
Always remember, using jumper cables is a temporary solution and may not keep your car’s battery charged for a long time. Make sure to fully charge or replace the battery as soon as possible.
Troubleshooting Charging Issues
If you’re experiencing issues with charging your car battery at home, identifying the root cause is crucial for effective troubleshooting. Start by examining the battery terminals. Corroded terminals can obstruct the flow of electricity, preventing your car battery’s state of charge from improving. Clean them using metal brushes and dedicated cleaners to restore proper connectivity.
Next, verify all charger connections are secure. Attach the charger to the positive terminal firmly; loose connections can prevent successful charging and starting. If the battery is completely dead, the indicator light on your charger may not illuminate.
Perform a battery test using a multimeter. If the reading is below 12 volts, the battery is flat and might need replacement. It’s essential to take into account the battery’s lifespan, typically around 4-5 years. If the battery is old, bad cells could be the issue and might necessitate a new battery.
Improper maintenance practices, such as neglecting regular checks, can lead to premature capacity loss. Periodically test the battery to monitor its state of charge and verify it’s in good condition.
Here’s a helpful table for common troubleshooting steps:
| Issue | Solution |
|---|---|
| Corroded Terminals | Clean with metal brushes and dedicated cleaners |
| Loose Connections | Verify secure attachment of charger to the positive terminal |
| Battery Completely Dead | Check indicator light; may need to replace battery |
| Low Voltage Reading (<12V) | Perform battery test; take into account replacement |
| Neglected Maintenance | Regular checks and tests to maintain battery health |
Frequently Asked Questions
Can You Charge a Car Battery With a House Outlet?
Yes, you can charge a car battery with a house outlet. Guarantee electrical compatibility by using proper charging equipment. Follow safety precautions for battery charging, focusing on energy efficiency, charging speed, and battery maintenance for peak performance and safety.
Can I Charge My Car Battery With Electricity?
Yes, you can. Use the right battery types and charging methods. Follow safety precautions and consider solar chargers or jump-starting. Regular maintenance tips and power sources like inverter options guarantee efficiency and safety during charging.
Is There a Way to Charge Your Car Battery at Home?
You can charge your car battery at home using battery charging methods like standard chargers or solar charging options. Guarantee home charging safety with proper charging accessories, follow voltage requirements, heed battery maintenance tips, and troubleshoot charging issues as needed.
How Long to Charge a Car Battery With Home Electricity?
Charging time varies based on battery capacity and charger types. Guarantee home safety by adhering to voltage requirements. Follow maintenance tips to extend battery lifespan. For charging efficiency, monitor progress and avoid overcharging. Expect 4-8 hours typically.
Conclusion
To summarize, charging your car battery with home electricity involves using a suitable charger and following precise steps. Always prioritize safety: connect the positive lead first, then the negative, and verify the charger is set to the correct voltage. Monitor the charging progress and disconnect in reverse order once fully charged. If complications arise, refer to troubleshooting tips. Proper handling of equipment and adherence to these guidelines will guarantee efficient and safe charging of your car battery.
