If you're considering a do-it-yourself electric car conversion, it's important to understand the steps involved and the benefits you'll gain. From selecting the perfect lightweight vehicle to fabricating an adapter plate for the electric motor, each stage requires careful planning and execution. You'll also need to think about the electrical system, including battery setup and motor installation, to make sure everything runs smoothly. But how do you get started, and what key aspects should you focus on to make your project a success? Let's explore the critical steps that will transform your conventional car into an eco-friendly ride.
Contents
Selecting the Right Vehicle
When selecting the right vehicle for an electric car conversion, it is vital to take into account several technical factors to guarantee a successful project. First and foremost, prioritize lightweight vehicles. Classic cars with cast iron engine blocks, such as the VW Beetle or the 1977 Chevrolet K5 Blazer, are ideal candidates. These vehicles enhance battery range and overall efficiency post-conversion due to their lighter frames compared to modern cars.
Modern vehicles, specifically those made post-mid-1990s, should be avoided. These cars often feature complex CANBUS electronics systems that can pose significant compatibility issues with electric components, complicating the conversion process. Classic models like the Mazda MX-5 are preferable because of their simpler designs and the availability of compatible conversion kits.
Additionally, you must verify the condition of the vehicle is suitable for conversion. Focus on cars with minimal major issues, which simplifies the conversion process and enhances project feasibility. It is important to prioritize the conversion itself over extensive restoration efforts. This approach can save time and resources, allowing you to channel efforts into the electric vehicle aspects of the project.
Another significant factor is the size and weight of the donor vehicle. The added weight of the batteries can impact the vehicle's performance and handling if it exceeds the design limits. Thoroughly assess the vehicle to avoid these complications, making sure it can accommodate the additional weight without compromising safety or functionality.
Stripping Gasoline Components
Selecting the right vehicle is just the beginning; the next step involves stripping gasoline components to prepare for the electric conversion. As a car owner, you'll need to remove several key gasoline components, including the gas tank, engine, radiator, and exhaust system. This process is essential not only for reducing the vehicle's weight but also for enhancing the battery range and overall efficiency of your EV conversion.
Start by safely draining and removing the gas tank. Make sure you're working in a well-ventilated area and take necessary precautions to avoid any fire hazards. Next, unbolt and detach the engine, a task that might require an engine hoist due to its weight. Following the engine, the radiator and exhaust system can be removed. These components are typically less cumbersome but still require careful handling to avoid damage to other parts of the vehicle.
During this process, be meticulous to avoid compromising any safety features, such as airbags, that must remain intact for safety compliance. Stripping gasoline components efficiently not only paves the way for the electric drivetrain but also offers a financial incentive. Selling these parts can markedly offset your conversion costs; for instance, you might earn around $550 from selling the extracted components.
Fabricating the Adapter Plate

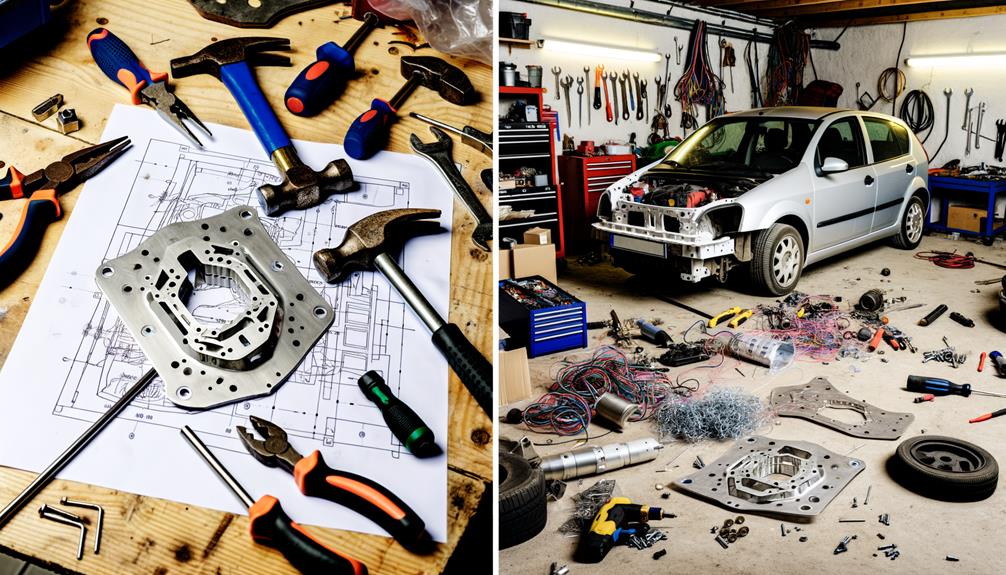
When fabricating the adapter plate, start by choosing aluminum for its lightweight properties, ensuring it won't add unnecessary load to your vehicle. Precision cutting and alignment are essential; collaborating with a machinist can help achieve the necessary accuracy. Make sure the plate's holes align perfectly with both the motor and transmission shafts to maintain proper alignment and avoid drivetrain issues.
Choosing Adapter Plate Material
For fabricating the adapter plate in your DIY electric car conversion, aluminum often stands out as the material of choice due to its lightweight properties, which help reduce the vehicle's overall weight, thereby enhancing both efficiency and range. The adapter plate must be precisely machined with aligned holes to guarantee a proper fit between the electric motor and the existing transmission, which is critical for drivetrain functionality.
When choosing aluminum for your adapter plate, consider the following factors:
- Weight Reduction: Aluminum's lightweight nature greatly contributes to overall vehicle efficiency and range.
- Machinability: Aluminum is relatively easy to machine, allowing for the high precision required in aligning the motor and transmission.
- Strength and Durability: Despite being lightweight, aluminum offers sufficient strength to withstand the torque and vibrations produced by the electric motor.
- Corrosion Resistance: Proper sealing and finishing of the aluminum plate can enhance its resistance to wear and corrosion, ensuring longevity.
Collaborating with a skilled machinist is often necessary to achieve the required precision in cutting and alignment, as even minor deviations can lead to major operational issues. Confirming the correct thickness and strength of the aluminum will help it endure the operational stresses of the electric motor, making it a reliable choice for your conversion project.
Precision Cutting and Alignment
Precision cutting and alignment of the adapter plate are crucial to the success of your DIY electric car conversion. The adapter plate serves as the essential link between your electric motor and the vehicle's transmission, necessitating the use of aluminum for its strength and lightweight properties. Precision is critical; any misalignment can lead to drivetrain inefficiencies and increased wear on components, ultimately compromising your project's performance and longevity.
Collaborating with a machinist is highly recommended to guarantee accurate cutting and precise hole alignment. The machinist can use specialized tools to fabricate the adapter plate with exacting tolerances, thereby guaranteeing the proper fitment of the motor and transmission drive shafts. This level of precision cutting is crucial; even minor deviations can result in significant issues down the line.
Opting for an aluminum plate with pre-drilled holes can simplify the assembly process. Pre-drilled holes guarantee that the electric motor mounts securely to the transmission, providing a stable foundation for the drivetrain assembly. Properly fabricated adapter plates are integral to the overall performance of your electric vehicle conversion, ensuring both maximum functionality and extended component life.
Motor and Transmission Fit
Craftsmanship is key when fabricating the adapter plate to guarantee a perfect motor and transmission fit. The adapter plate is the essential component that connects your electric motor to the existing transmission, guaranteeing precise alignment of their drive shafts. This alignment is important; any deviation could lead to drivetrain inefficiencies or mechanical failures.
To fabricate the adapter plate, follow these steps:
- Material Selection: Use an aluminum plate for its strength and lightweight properties.
- Precision Cutting: Collaborate with a machinist to guarantee the plate is cut accurately, with holes perfectly aligned.
- Measurement and Alignment: Meticulously measure and align the plate to match both the motor and transmission mounting points.
- Mounting and Testing: Securely mount the adapter plate and test its ability to withstand the torque produced by the electric motor.
During the process, you may need to drill, machine, and add spacers to accommodate different motor sizes and configurations. Accurate measurement and alignment can't be overstated. Misalignment can compromise the overall performance and safety of your electric vehicle conversion. Guaranteeing the adapter plate is securely mounted and capable of withstanding the torque is essential for a successful and reliable conversion.
Preparing and Installing the Motor
To start, select a suitable electric motor, such as one from a dismantled forklift, guaranteeing it's cleaned, insulated, and functional. Next, fabricate an aluminum adapter plate to connect the motor to the existing transmission, maintaining accurate alignment for proper integration. During installation, ensure the motor fits within the chassis, make necessary modifications, and use heavy gauge cabling for electrical connections, including a 0-5Kohm potentiometer as throttle control.
Selecting Electric Motor
When starting on the task of selecting an electric motor for your DIY electric car conversion, it's vital to align the motor's specifications with your vehicle's requirements to guarantee peak performance. One cost-effective approach involves sourcing a used electric motor from dismantled forklifts. These motors can often be found for about $50, making them an economical choice for EV conversions.
To optimize performance and efficiency, verify the electric motor's voltage range matches your vehicle's needs, ideally between 48-72 volts. Before installation, thorough cleaning and inspection are essential. Focus on degreasing and insulating components to confirm the motor functions properly and lasts longer.
Here are key considerations to guide your selection process:
- Voltage Compatibility: Match the motor's voltage with your vehicle's electrical system.
- Condition of Motor: Always clean and inspect the motor before use.
- Adapter Plate Precision: Verify the aluminum adapter plate is precisely aligned to prevent drive shaft misalignment.
- Rotor Security: Secure the rotor and conduct a final functionality check.
Motor Installation Process
Starting the motor installation process involves fabricating an adapter plate that securely connects the electric motor to the existing transmission, guaranteeing precise alignment for ideal performance. This step is essential to confirm that the motor and transmission drive shafts are perfectly aligned, preventing undue wear and ensuring efficient power delivery.
First, acquire a suitable electric motor, such as a $50 dismantled forklift motor. Before installation, meticulously clean and insulate the motor. Check its functionality by running a few tests. Once you're confident in the motor's condition, position it in the vehicle's engine bay. Secure the motor with robust mounts capable of withstanding operational vibrations and stresses.
Next, connect the electric motor to the controller using heavy gauge cabling. This guarantees a reliable power delivery system capable of handling high currents. Integrate a 0-5Kohm potentiometer to serve as the throttle, allowing you to regulate the power delivery to the motor effectively.
Setting Up the Electrical System

Setting up the electrical system in your DIY electric car conversion demands meticulous attention to detail and a clear understanding of each component's role. At the heart of your electric conversion is the battery pack, typically comprised of 6 x 12V Deka Dominator Gel-Cell batteries, forming a 72V system. Proper placement of these batteries is vital for vehicle balance and performance. You'll want to install four batteries in the cargo compartment and two in the front radiator area.
A solid-state controller, such as the Curtis 400 amp peak PWM controller, is essential for regulating the power flow between your battery pack and motor. This controller operates within a 48-72 volt range, guaranteeing smooth power delivery and efficient performance. Integrating this controller requires careful wiring using heavy gauge cabling to handle the substantial current.
To facilitate the charging process, a dedicated 72V charger is indispensable. These chargers, costing around $200, confirm that your batteries are charged safely and efficiently, maintaining the overall health of your electrical system.
Here's a checklist of critical components you'll need:
- Battery Pack: 6 x 12V Deka Dominator Gel-Cell batteries
- Controller: Curtis 400 amp peak PWM controller
- Charger: Dedicated 72V charger
- Cabling: Heavy gauge wires for secure connections
Lastly, to manage acceleration, a 0-5Kohm potentiometer will serve as your throttle, providing precise control over your vehicle's speed. Additionally, don't forget about integrating power steering if your vehicle requires it, as this can greatly affect your driving experience.
Installing Batteries and Controller
To begin installing the batteries and controller, make certain you have all necessary tools and components at hand. You'll need six 12V Deka Dominator Gel-Cell batteries for a 72V system, a high-voltage controller like the Curtis 400 amp peak PWM controller, heavy gauge cabling, and a 0-5Kohm potentiometer. Place four batteries in the cargo compartment and two in the front to maintain optimal weight distribution and center of gravity.
Start by positioning the batteries. Secure them using battery trays or brackets that can handle their weight. This step is essential to guarantee stability and safety. Once the batteries are in place, connect them in series using heavy gauge cables. This will provide the required 72V necessary for the electric power system. Verify all connections are tight and secure to prevent any possible disconnections or electrical faults.
Next, install the controller. The Curtis 400 amp peak PWM controller is your best bet for managing the flow of electric power from the batteries to the motor. Mount the controller in a well-ventilated area to prevent overheating. Connect the positive and negative leads from the battery pack to the controller's input terminals. Use appropriate connectors to ensure a reliable and safe connection.
For throttle control, integrate the 0-5Kohm potentiometer. This device will allow you to smoothly regulate acceleration. Connect it to the controller as per the manufacturer's instructions, ensuring proper calibration for responsive handling.
Testing and Troubleshooting

With the batteries and controller securely installed, the next step is to ascertain everything functions correctly through thorough testing and troubleshooting. Before you hit the road, you must make sure your electric motor is in peak condition. Begin by testing the motor's functionality. Confirm it's clean, properly insulated, and reassembled to avoid operational issues.
Next, use a multimeter to check voltage and current readings throughout your electrical system. This tool will help you verify that all connections are secure and functioning as intended. Pay special attention to the battery box, ensuring there are no loose connections or signs of corrosion. Here's a structured approach to systematically conduct your tests and troubleshooting:
- Motor Functionality Check: Test the electric motor for smooth operation and proper assembly.
- Electrical System Verification: Use a multimeter to verify voltage and current flow, checking all connections.
- Test Drives: Conduct multiple test drives to evaluate acceleration, braking efficiency, and range. Adjust settings based on performance metrics.
- Troubleshooting Common Issues: Review wiring diagrams and consult community resources to resolve controller errors or battery failures.
After initial testing, take the vehicle for several test drives. Assess key performance metrics like acceleration, braking efficiency, and driving range. Make necessary adjustments to the controller settings or battery box configuration based on these observations.
Implement a robust troubleshooting process for any issues that arise. Common problems like controller errors or battery failures can often be resolved by reviewing wiring diagrams and seeking advice from community resources.
Frequently Asked Questions
How Much Would It Cost to Convert My Car to Electric?
You're looking at $8,000 to $30,000 for conversion kits, $10,000 to $30,000 for battery types, plus $5,000 to $20,000 for charging infrastructure. Costs vary based on power needs, component choices, and professional consultations.
What Are the Easiest Cars to Convert to Electric?
You'll find popular models like the VW Beetle and Geo Metro are the easiest for conversion. Their simpler mechanics, available conversion kits, and diverse battery options streamline the process, making them ideal for efficient and cost-effective electric transformation.
Is It Worth Converting a Car to Electric?
It's worth converting a car to electric if you value environmental benefits, performance improvements, and are ready to tackle DIY challenges. You'll see reduced emissions, better efficiency, and potential long-term savings, though initial costs and technical expertise are required.
What Do I Need to Convert My Car to Electric?
To convert your car to electric, you'll need to take into account battery selection tips, motor compatibility factors, and charging system options. Choose a lightweight donor vehicle, verify motor alignment with the transmission, and follow local regulations for modifications.
Conclusion
By following these steps, you'll transform a traditional gasoline vehicle into an efficient electric one. Selecting the right vehicle, stripping gasoline components, fabricating the adapter plate, and installing the motor are critical. Setting up the electrical system, including batteries and controller, guarantees peak performance. Thorough testing and troubleshooting will finalize your DIY electric car conversion, providing a sustainable and eco-friendly alternative to conventional transportation. Enjoy the satisfaction of contributing to a greener future.
